Friday, January 21, 2011

Americano Vest

Here's the completed Americano Vest from the Berroco Chunky & Vintage Chunky Booklet #302. Completed using size 10 needles and Cascade 128 Chunky. It took less than 3 skeins.
Showing my back yoke seam that I kept visible for a "design element!" I am hunching over sort of, don't know why. I thought maybe I was making it look "flatter" that way.

Trying out buttons...after finishing off the edging and blocking.

This image is a photo I took of the project page of "Americano" out of the Berroco Vintage & Vintage Chunky Booklet #302, a lovely vest pattern I fell in love with. All the projects are named after locations in my Seattle area and vicinity. This booklet was my final purchase when my local yarn shop closed this past year. I was unable to find the called for yarn on a recent trip to another yarn shop, so chose a Cascade 128 chunky yarn for this project. It is very soft and felt great working up on a size 10 needle.

This vest is worked in pieces and has some great textures and angles that make it intriguing to work and to seam up. Shown below in pieces being held down by some random objects!


I love the front pieces and the K3tog that makes a nice faux seam up the front, then angles off as you continue in a K2tog.

I chose to do the back yoke seam as a visible seam, because I felt it would be fun to do so, considering all the other texture and seams that are visible in this project.


The edges do curl so blocking is imperative. An edging will be placed around the neckline and buttons will get added. This is turning out to be an adorable vest! I have done the size 38.

A quick and gratifying knit!
With alot of visual interest and angles. I learned that M1K doesn't mean make one, then knit one! I knit this with the memory that some of the time I was working on it was spent as my friend was going through a very hard time in which she lost her husband. I knit some of it while sitting with her mother. I knit some of it after hearing that her mother in law was blessed by my teaching her to knit, so she could knit at the hospital by his bedside and felt as if I were right there with her. In these times I feel knitting is my gift from God. To me, and to others.

Saturday, January 8, 2011

Green Day Vest

And here's the finished Green Day Vest -The pattern was free on Ravelry.
Of course I haven't really blocked it yet. I can never wait for that! This vest fit the bill for using my Irish wool. I had been saving this wool since my trip to Dublin Bay Knitting Company a few years ago. Wanting something with cables, just waiting for the right pattern. I thought maybe a vest without sleeves so I wouldn't get too warm. This vest will always remind me of our trip down to Portland, where we discovered the culinary delights of eating out there. And our little trolley trip to the Pearl District with my patient friends, who browsed in a card shop while I bought this yarn. The neckline is deeper than some vests. That could be adjusted by starting later on the neckline decreases. Used size 8 needles for body, size 6 needles for ribbing and my beloved stash of Aran Wool from Kerry Woollen Mills. Modified by adding a nice buttonband to front. I learned the 3- needle bind off method (a link below in my text), and had fun with slipping stitches and passing them over. I do like the one-row button hole for a tidy buttonhole method. (link below in text)

Stages of the Green Day Vest:
Interesting hemline with a twisted knit stitch every third row.


Ribbing across the back is a P2K6. I omitted the called-for side cables from armhole to hem.Working the cable pattern up the front. It's popping out nicely.Showing the piece layed out with the back in the "middle". Stitches are put on hold on the fronts while you work up the back and bind off the armholes and neckline.Neckline stitches are decreased after completing the cable and then fronts are knit upward to "meet" the back. Shoulder seams are made using the 3 needle bind off method. Very easy and very clean way to seam the shoulders.Stitches are picked up around the neckline using size 6 needles. I picked up 120 stitches total. Then worked 8 rows of K2P2 rib, and bound off on WS. Next I picked up 48 stitches for each front buttonband and did 8 rows of K2P2 rib. I made six one row buttonholes 4 stitches apart. These are the nicest finished buttonholes I have ever done. The U-Tube tutorial is easy to follow. Lastly, I will pick up some stitches around the armholes for another little ribbed edge, then get some buttons on and try to block this one a bit! Then it will be time to wear!

Thursday, December 30, 2010

A Tweedy New Year


I've had this Aran wool from Kerry Woollen Mills that I got at Dublin Bay Knitting Co. in Portland, OR awhile back. I have been saving it up to do an Irish tweedy vest of some sort. Here is my first try at doing one. The pattern: Bramblewood. I found the yarn to be very scritchy and stiff. I tried spraying with water and blocking out a bit to see if it would change and "bloom" a bit, and I think it would. Then as I went along, it just didn't seem the cables were "popping" out as they should so I am not sure I want to continue this vest,as the cables are on both back and front sides.
Though I do love this pattern...


They show up a bit more on the top section, as that is what I sprayed and tried to block, poke and prod the cables to come out a bit. I have set this one aside for now.

Instead I found an easy Green Day vest pattern that I am trying since I have plenty of the yarn to begin again. And maybe it will be easier to work with this new pattern.


It has a twisted knit row every third row on the hemline. It calls for other cables to run from underarm to hem on the sides, however I am omitting those cables.


I'm liking it so far...It's very cold out here and nice to be working with tweedy wool.
Happy Knit Year!

Sunday, December 26, 2010

Merry Christmas Knitting and hello, yellow bird artwork!

Merry Christmas to all! I was blessed by handmade cards by my "artist" daughter. She will be very likely to sell her artwork on etsy, and also has her portfolio and contact information up online. She is a graphic designer/illustrator/sudio artist. You can find her work here: http://www.wix.com/berg21/portfolio#! And her blog here: http://nicoleberger-helloyellowbird.tumblr.com/


...and sheep stitch markers given to me by my son in law and other daughter. Shown here working on my next project, with "happy" sheep adorning my needles!

Friday, December 17, 2010

Push the Reset Button

Shortbread #4 is the same version as below, except using only 6 Tbl. corn starch and about 1/2 c. (?) or more ground almond meal, adding 1/2 tsp. salt and 1 tsp. vanilla. I pulled out of oven when it started to get golden. Cut while warm. Then dusted with powdered sugar while warm. This tastes very much like our family favorite, Almond Crescents, but easier to make in a 9 x13 pan!
Shortbread Try #3: This time I used the whole cup of cornstarch. Not even a "scant". Felt weird putting that much cornstarch in. I also added 1/2 tsp. salt since I used unsalted butter and we decided shortbread has to have salt to taste right.

It came out like this, but I put back in the oven to see if I could get it to cook a bit more after I cut it.

The edge pieces looked like this. The center ones were poofier.


I would have to say the flavor was good. I dusted with granulated sugar prior to baking. Recipe calls for powdered sugar dusting after it comes out of the oven, which tastes great too, we found upon our last test trial.


The cornstarch seems to make it taste a bit lighter and a bit crispier on the edge pieces, but seems to add a puffiness to the center pieces that is also nice.


Knitting along on the 1 x 1 rib scarf in between batches of Scottish Shortbread. Using O-Wool...easy knit, easy going...vacation pace!

Trying Scottish Shortbread Recipe #2: This one called for scant 1 c. cornstarch. I only had but a few tablespoons, so I threw that in, then added about a few shakes-maybe 1/2 c.- of ground almond meal for good measure. I also added in 1/2 tsp. salt this time, since I used unsalted butter. Kind of like a combination of our family favorite recipe for "almond crescents" mixed with the shortbread recipe below-minus, as I mentioned, most the corn starch!:


Baked as directed and here are the results, after shaking on the powdered sugar:


Mighty good, mighty good. Yes, indeed. I gained a pound just looking at them! I might try this one again after purchasing more corn starch and see how that turns out doing them again with the 1 c. cornstarch. The ground almonds are a great addition, by the way!


Pushing the reset button on life and going into Christmas baking mode around here....Recipe attempt #1 yielded a thin cookie. I used unsalted butter and therefore, it was not quite as salty as it probably should've been. I sprinkled granulated sugar over the top before baking. Here is how they appeared after being cut. Not too poofy. Might need to use an 8x8 pan to make double the poofiness.


The recipe I used was from here:


My husband was happy to test them out. We decided it needed the salt and maybe I would try another recipe until I hit it right.


And a bit of mindless easy knitting on a scarf using alternating colors of O-Wool. In a knit 1, purl 1 rib. I am slipping the first and last stitch of every 2nd row purlwise to have the edges look cleaner.


Friday, December 10, 2010

Fast Fingerless Gloves

These lovely gloves "winged" their way all the way to my knitter friend in the UK, where I hope they will keep her toasty warm while they are experiencing quite a snow storm over the holidays.
This link here:
How to Knit Fingerless Gloves
is a video I found with a super easy "recipe" for fast fingerless gloves. I know you thought I'd never make any more after last year when I made like 10 pairs of Fetching. I have made alot of these easy pairs in the past few days. Easy because no cabling is required. And they don't have thumbs. But you could add them.Use bulky worsted weight yarn. Size 9 needles. Or 10. Cast on 24. K2 P2 in rib for 15 rows for cuff, then knit in stockinette for 12 rows (or more for longer gloves), K2 P2 rib for 4 more rows and cast off in rib. Sew the side seams leaving room for your thumb. Voila! A bit of leftover stash used up.

Two -toned gloves using a smaller gauge yarn, casting on 34 instead, and using a lighter grey on the trim.

And a few gifts are made!

Sunday, December 5, 2010

Yarn and coffee in Mt. Vernon, WA

A sneak preview of my upcoming project: Mythos. It's a sweater using fingering weight yarn on size 7 needles. Slow going with the stockinette stitch, but I am alternating between two colorways of yarn that keeps me "paying attention." If you want to see a fabulous version of Mythos, you should check out my side bar and go to Busy Bea Knits. Hers is fantastic!
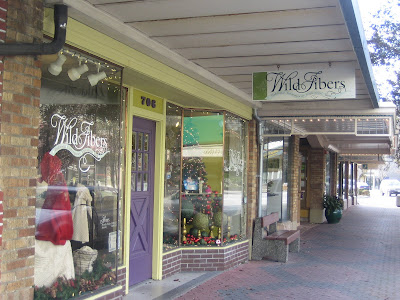
I got to visit the Wild Fibers yarn shop in Mt. Vernon, WA on our way up north today. They had a fantastic selection. I really loved all they carried. All the great "names" in yarn: Cascade, Noro, and Debbie Bliss, Spud and Chloe, Berroco, Rowan, Manos del Uruguay, etc... and some pretty hand painted sock yarns. They also had some really cute buttons. Plus, they were open on a Sunday. Cute sign in the bathroom that reads: This bathroom is very old- it used to be the jail! The toilet will not flush properly unless it has stopped running from the previous flush....

Ristretto coffee had a nice latte made for me, not too hot... and festive straws for the season. Ahhh...