
And now, the moment I've been waiting for: My fabric-covered Homasote board is going up in the craft room! I think this gives you a good idea of what it will look like above the desk. This board will allow me to use tacks, push pins and hang up memos or photos in style! It just needs to air out a bit in the garage and get screwed to the wall, but here is where it is going:
 And here is how we made it. Step One: Order the Homasote board from a reputable lumber place that will special order it in for you. You should be able to get a good sized piece for $40 or under. Ours cost $35 for a 4 x 8' sheet. They may do special size cuts for you, or it may be a standard size when it arrives and you may have to cut it down to fit your particular wall area. In our case, they helped cut it roughly to size. Both my husband and I are making boards for our separate rooms and he did do some cutting to finish them off, as he had the special saw blade he needed to do so. It is messy to cut, as well as thick. It's made out of compressed recycled paper type material. It cannot get wet or it will swell up. (Edited to add: I believe I am partially wrong on this. Thanks to Ellen's comment, and after googling around, I see alot of knitters actually use the Homasote as a blocking board! So the slight dampness during blocking is OK. Maybe it is only not supposed to get super doused. I surely would like to use our extra piece as a blocking board. That makes me even happier!)

 My husband softened the edges a bit with another tool.
 Step Two: We practiced laying out my fabric and decided how we wanted it centered. I found my fabric at IKEA and payed $8.99 for it. It is a very heavy cotton. Make sure yours is ironed and fairly wrinkle free. I did not have to iron mine. It was substantial enough and wrinkle free at purchase. You might want to avoid any fabrics that might snag easily with your push pins.

Step Three: Next, my husband sprayed a good layer of this adhesive on the bare board and gave it a minute or two to start getting tacky.

Step Four: Then we each stood at either end of the table and held the fabric very taut as we eased it down into place at the top of the board, holding it down tightly at the top two corners. Then making our way slowly, easing the fabric down gradually onto the board as we headed in the direction of the bottom of the board. Then we made sure it was flat, smoothed out and had no wrinkles.

Step Five: We carefully flipped the board upside down onto a clean large piece of cardboard on the garage floor to begin the stapling process. With a staple gun and pulling the fabric tauht as we went, staples were placed on all sides.

Corners of the fabric were folded in and made as flat as possible before stapling.


Now the board needs to air out a bit from the adhesive fumes so we will give it a rest.
 Step Six: Then we will install on the wall using these (shown below) along with screws.

And when it's done, it will look like this (with the wall screws). And I can start tacking and pinning to my heart's content!

And voila! My room feels even more complete. You can really have fun with the fabric choices out there!

 It just needs to air out a bit in the garage and get screwed to the wall, but here is where it is going:
 And here is how we made it. Step One: Order the Homasote board from a reputable lumber place that will special order it in for you. You should be able to get a good sized piece for $40 or under. Ours cost $35 for a 4 x 8' sheet. They may do special size cuts for you, or it may be a standard size when it arrives and you may have to cut it down to fit your particular wall area. In our case, they helped cut it roughly to size. Both my husband and I are making boards for our separate rooms and he did do some cutting to finish them off, as he had the special saw blade he needed to do so. It is messy to cut, as well as thick. It's made out of compressed recycled paper type material. It cannot get wet or it will swell up. (Edited to add: I believe I am partially wrong on this. Thanks to Ellen's comment, and after googling around, I see alot of knitters actually use the Homasote as a blocking board! So the slight dampness during blocking is OK. Maybe it is only not supposed to get super doused. I surely would like to use our extra piece as a blocking board. That makes me even happier!)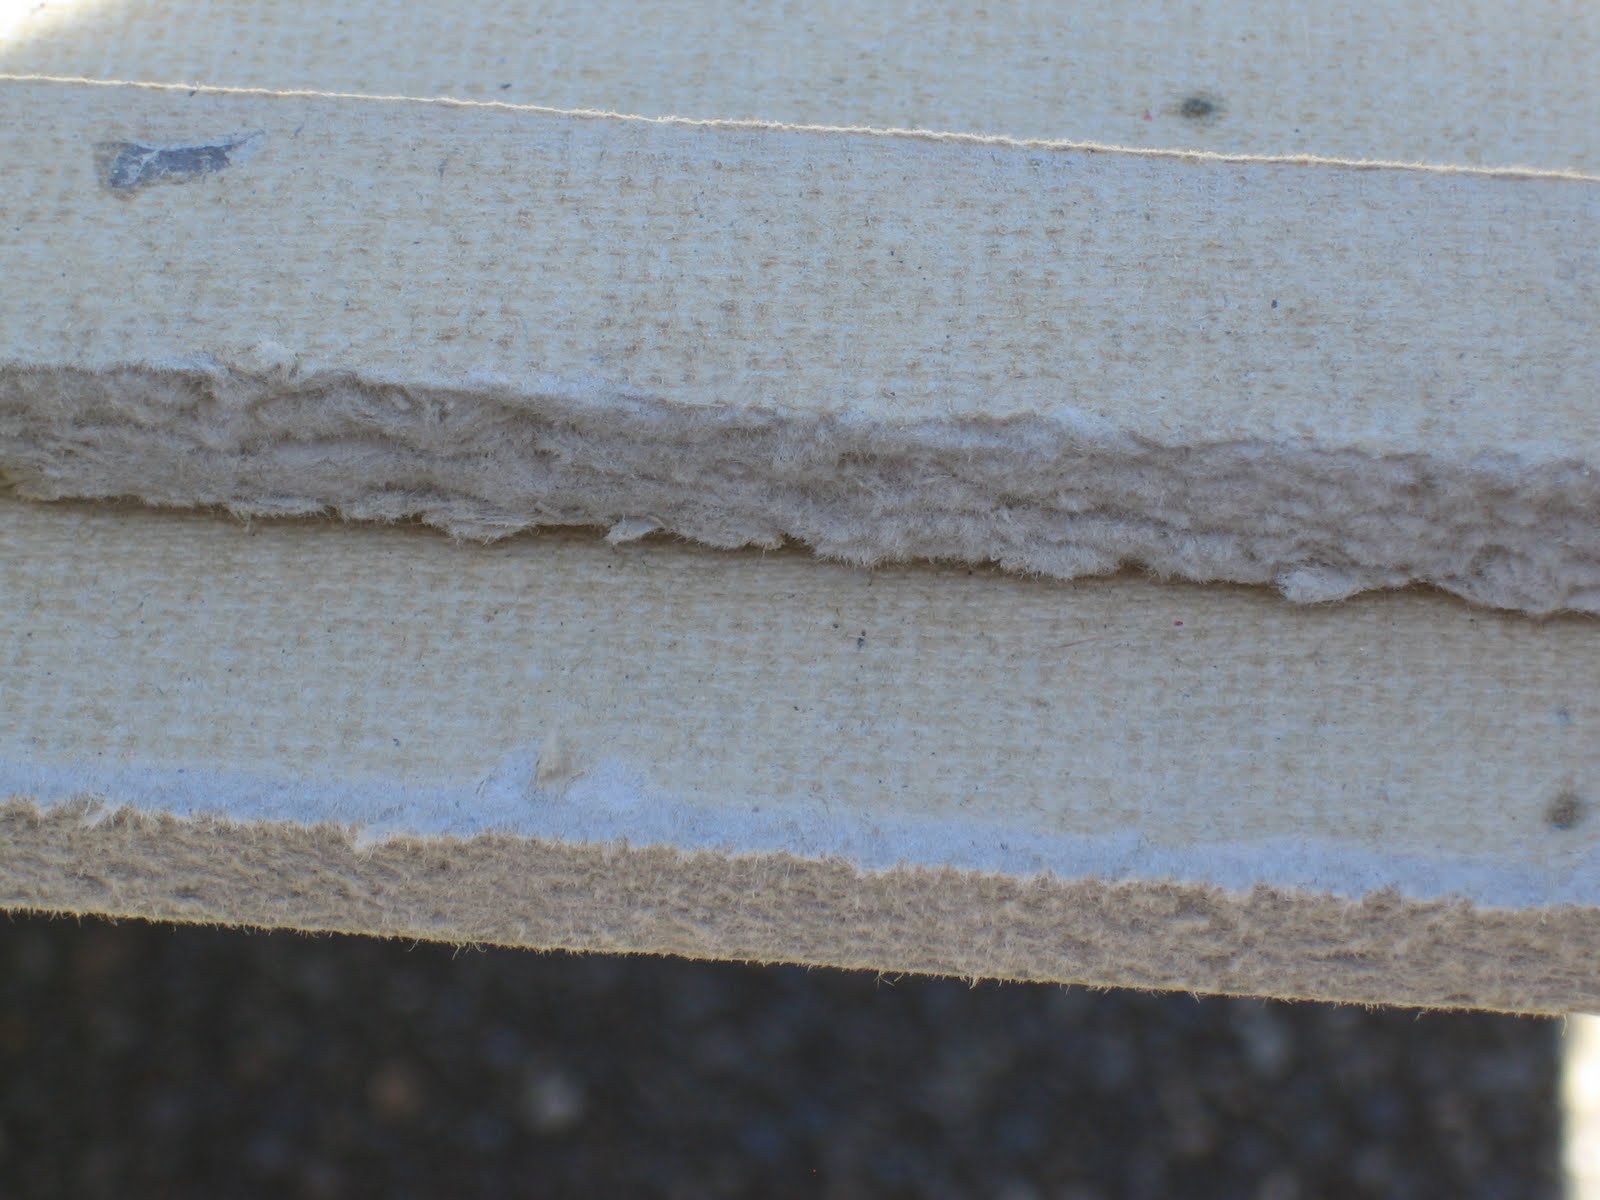
 My husband softened the edges a bit with another tool.
 Step Two: We practiced laying out my fabric and decided how we wanted it centered. I found my fabric at IKEA and payed $8.99 for it. It is a very heavy cotton. Make sure yours is ironed and fairly wrinkle free. I did not have to iron mine. It was substantial enough and wrinkle free at purchase. You might want to avoid any fabrics that might snag easily with your push pins.
Step Three: Next, my husband sprayed a good layer of this adhesive on the bare board and gave it a minute or two to start getting tacky.

Step Four: Then we each stood at either end of the table and held the fabric very taut as we eased it down into place at the top of the board, holding it down tightly at the top two corners. Then making our way slowly, easing the fabric down gradually onto the board as we headed in the direction of the bottom of the board. Then we made sure it was flat, smoothed out and had no wrinkles.

Step Five: We carefully flipped the board upside down onto a clean large piece of cardboard on the garage floor to begin the stapling process. With a staple gun and pulling the fabric tauht as we went, staples were placed on all sides.

Corners of the fabric were folded in and made as flat as possible before stapling.


Now the board needs to air out a bit from the adhesive fumes so we will give it a rest.
 Step Six: Then we will install on the wall using these (shown below) along with screws.
And when it's done, it will look like this (with the wall screws). And I can start tacking and pinning to my heart's content!

And voila! My room feels even more complete. You can really have fun with the fabric choices out there!

And the unexpected bonus is: I can use the leftover piece as a blocking board, apparently!


